Lab 3: Characterizing the Robot
The goal of this lab was to characterize the RC car and explore its cabilities. I also set up the robot simulator in my VM and explored the behavior of the simulator. In this lab, I conducted various physical tests with the RC car as well as performed my own physical measurements.
The RC Car
This section will discuss the different measurements and experiments conducted with the RC car.
Physical Measurements
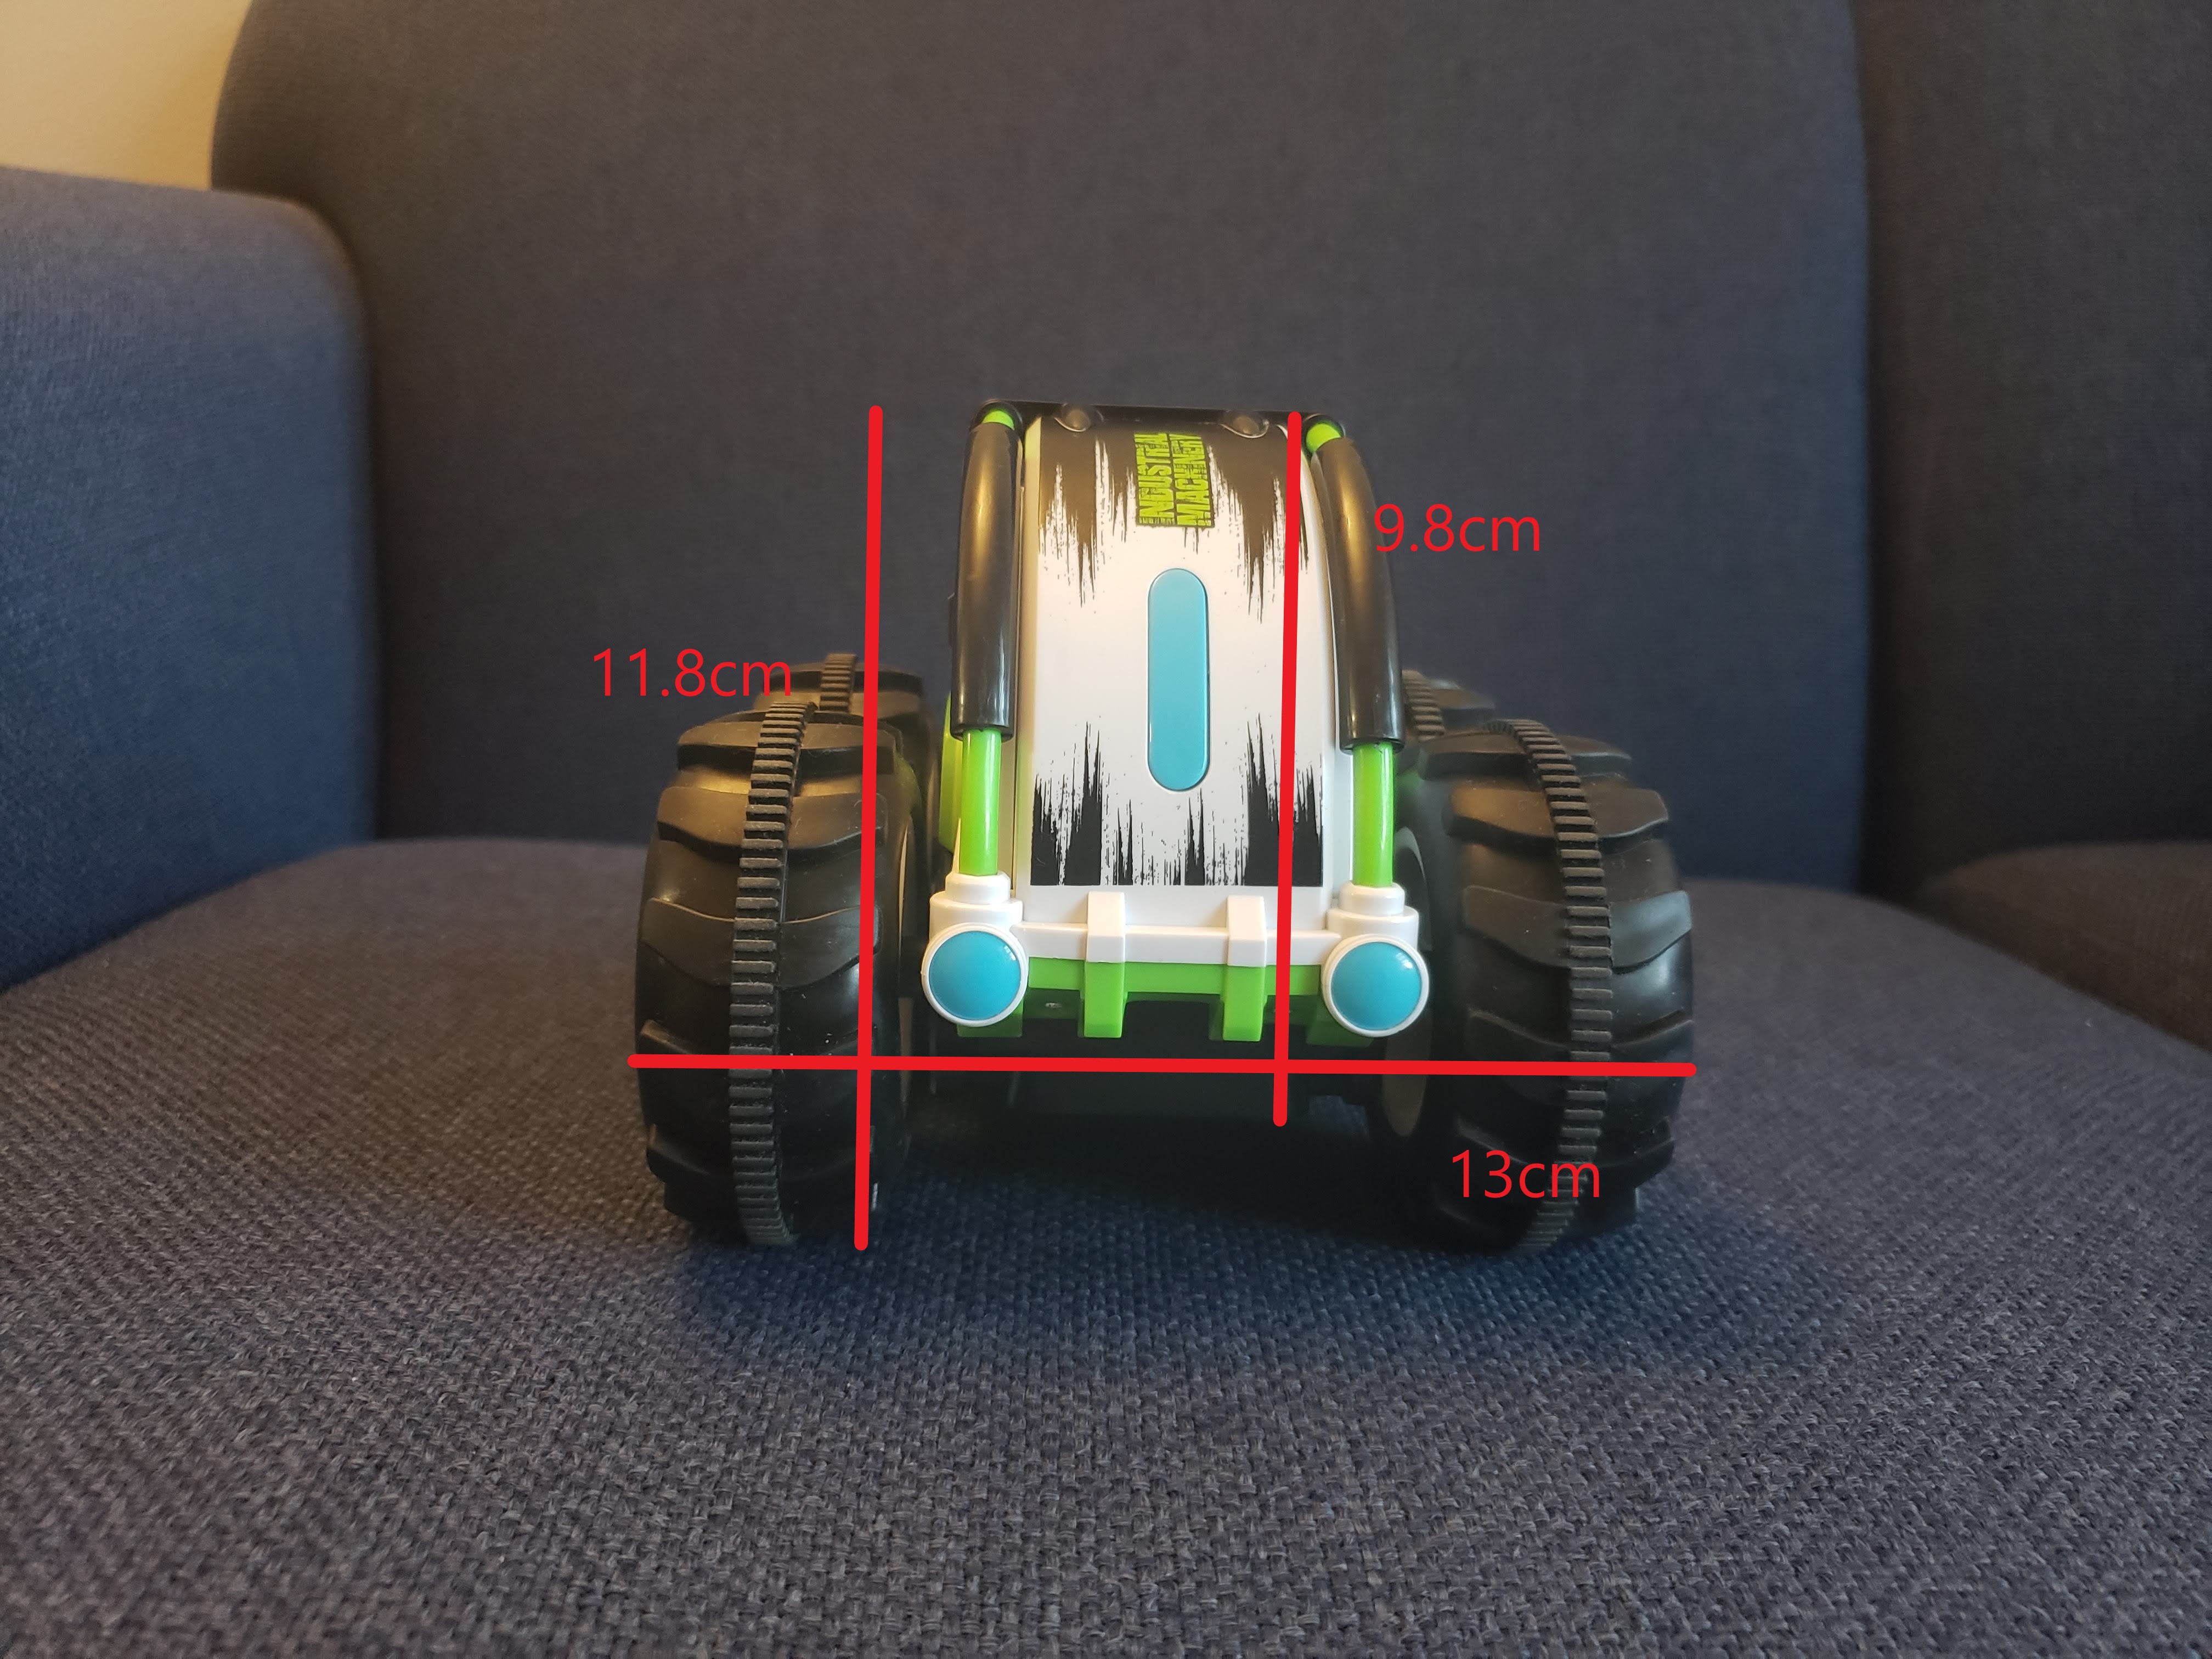
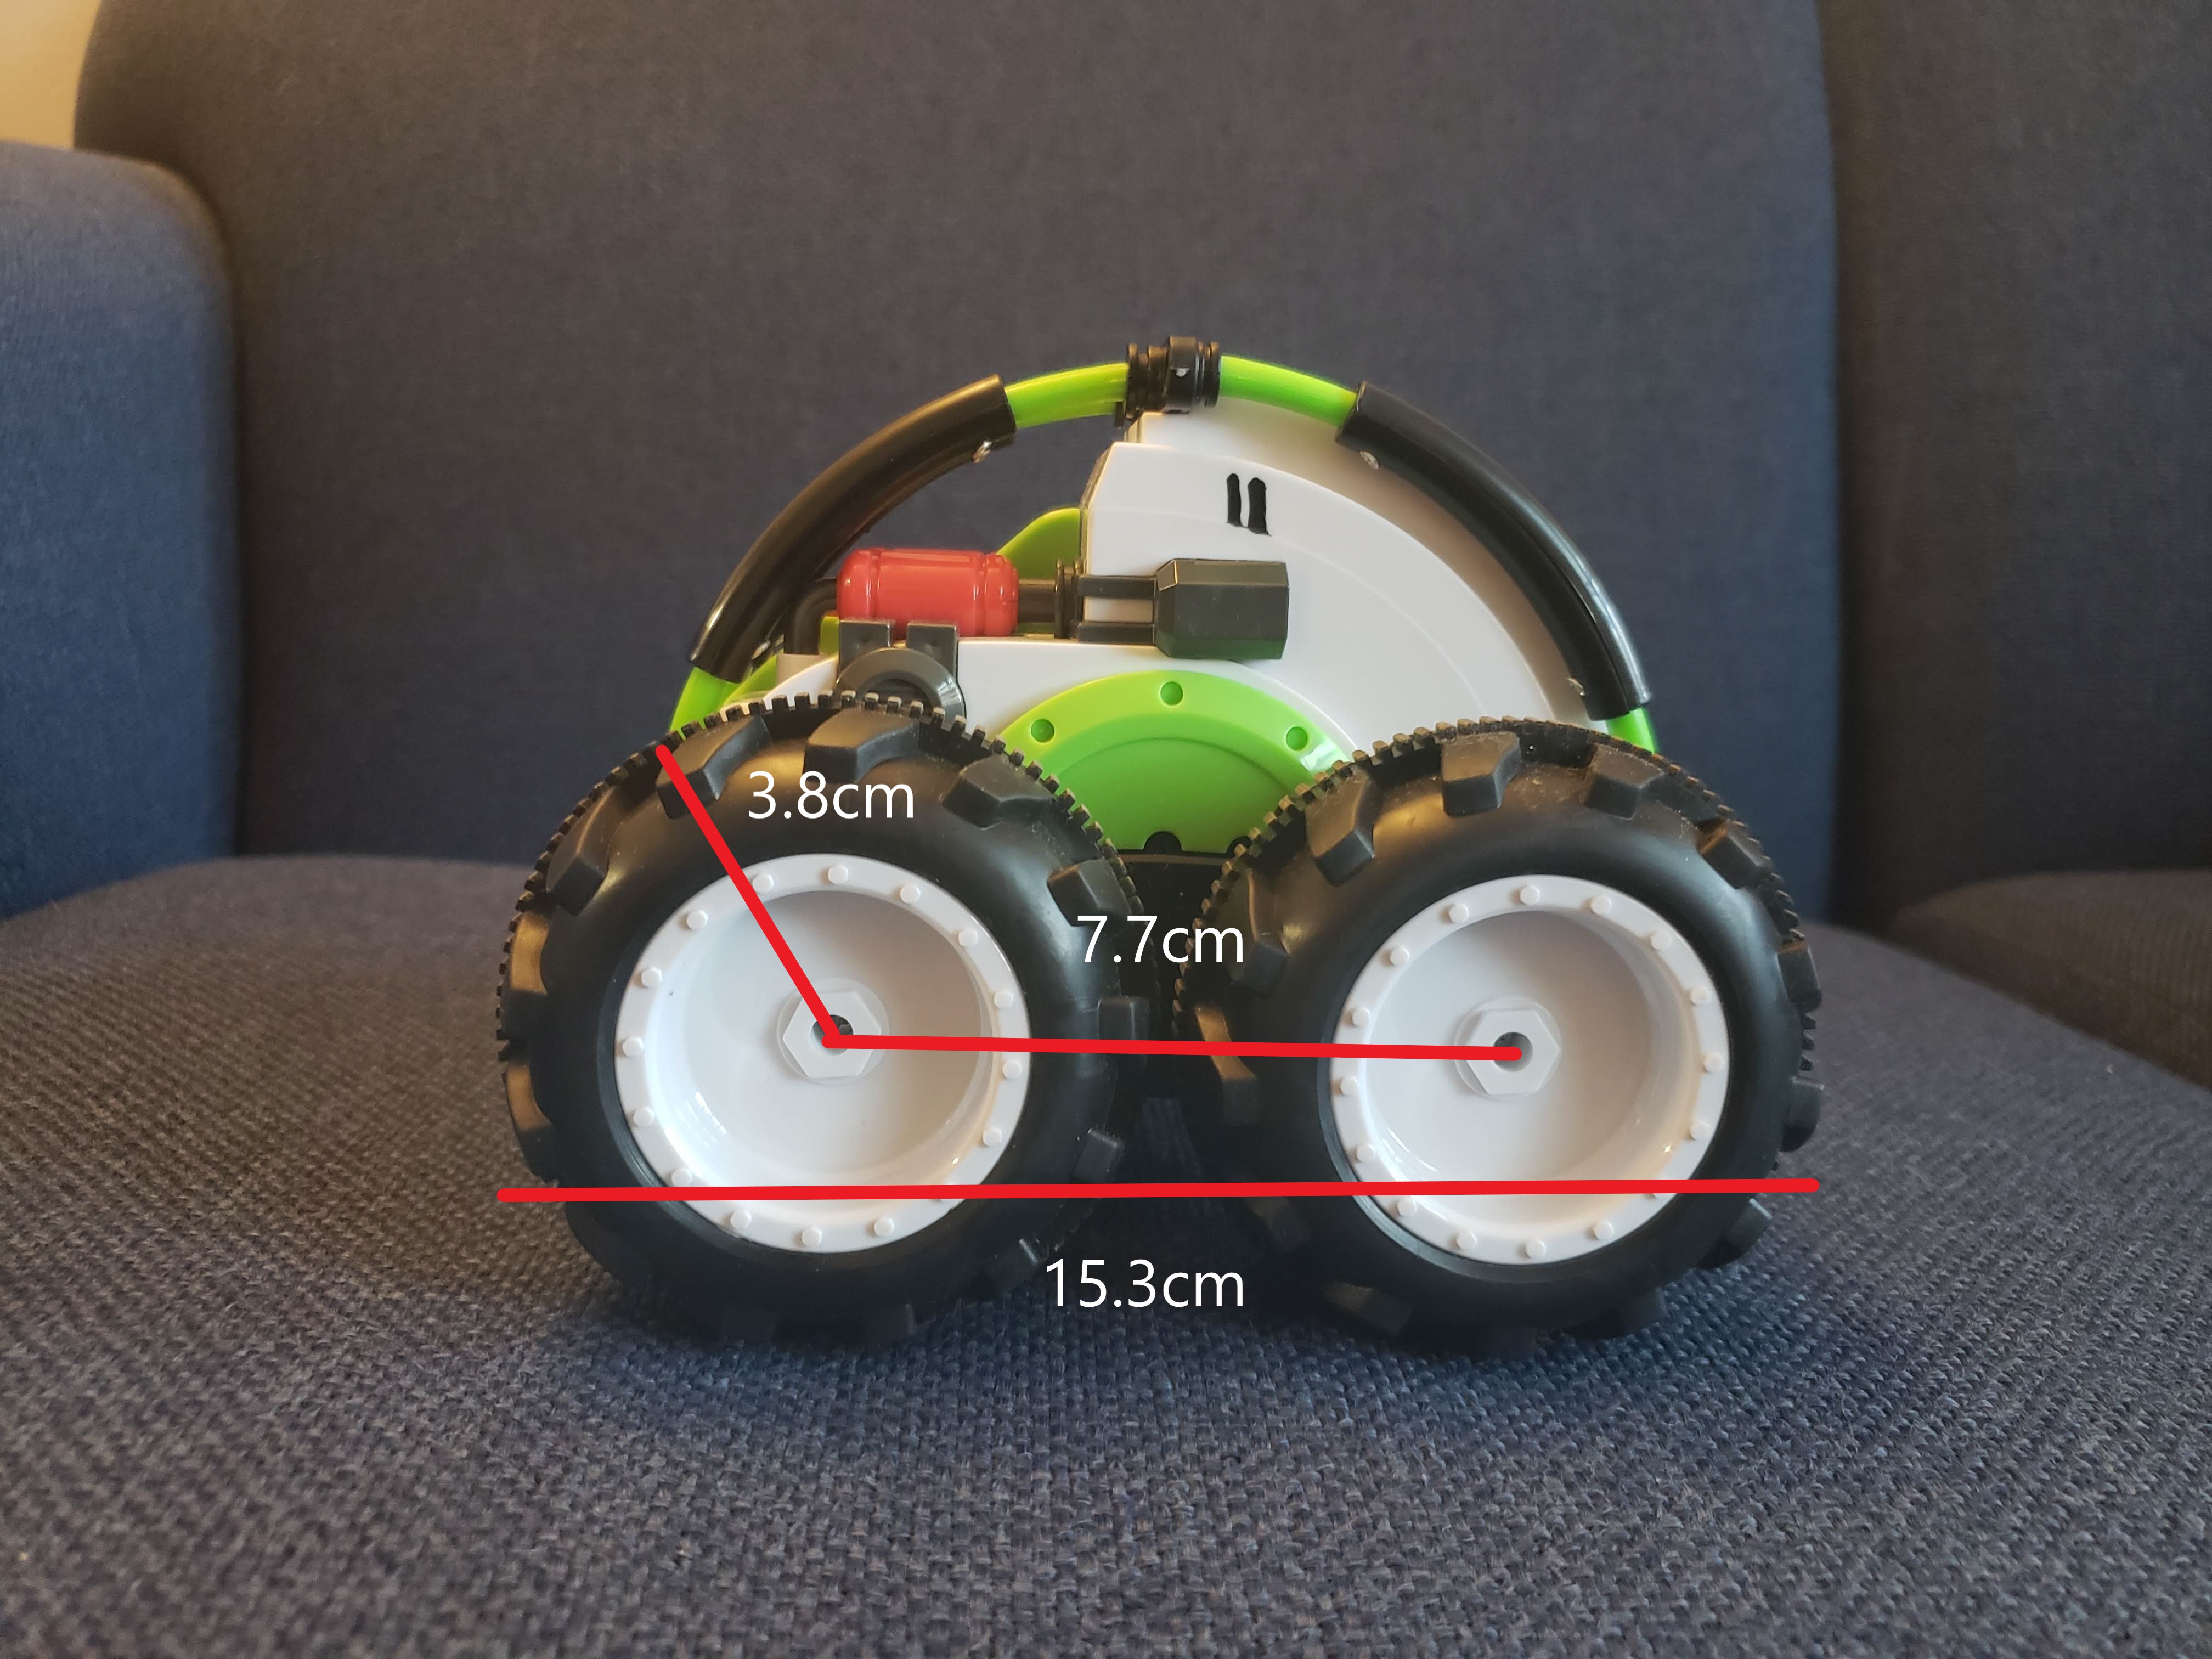
I found the car to have the following dimensions:
- Height (bottom of wheels to top of chassis): 11.8cm
- Height (bottom of chassis to top of chassis): 9.8cm
- Width (outer edge of wheel to outer edge of wheel): 13cm
- Length: 15.3cm
- Wheel radius: 3.8cm
- Distance between wheel centers: 7.7cm


Wheel Speed
Wheel speed measurements were taken by putting a marker on the wheel and running the robot under a slow motion camera. I could then count the number of revolutions of the wheel in a given period of time. This method does not acccount for slippage or friction, but I did not have the resources at my disposal to set up an accurately measured track to measure the speed of the car.
The following wheel speeds were found:
“Speedy” mode: 12.7 rev/s
“Slowly” mode: 11.4 rev/s
Turning
I took some time to see how the car handles turning. While these tests did not provide super accurate measurements, they gave me a better understanding of the car and the ways it can turn. One interesting find was that the robot performed significantly worse when making left turns than when making right turns. The turning radius for right turns was conistently less than that of left turns.
Right and left turns were characterized by only moving the joystick that controlled that set of wheels. I.e. for a right turn, the left stick was held down so the left wheels would spin, turning the car to the right. The right stick was untouched.
In place turns were done by holding both sticks in opposite directions.
Here is what I found:
For a right turn in “speedy” mode, the front right wheel will end up about 2-4 inches from the starting position for a 180° turn.
For a left turn in “speedy” mode, the front left wheel will end up about 5-6 inches from the starting position for a 180° turn.
For successive turns (left or right) in “speedy” mode, the turning radius would decrease until the noted wheel was practically stationary.
For a right turn in “slowly” mode, the front right wheel ends up about 3 feet from the starting position.
For a left turn in “slowly” mode, I could not create enough room to complete the turn. In the same space where a right turn could easily be completed, a left turn could not. The RC car repeatedly hit a wall, even with a 4 foot buffer.
The car can reliably turn in place in “speedy” mode by putting the sticks in opposite directions. This was the case for both left and right spins.
For turns in place in “slowly” mode, there was a bit of slippage at the start before the car would spin in place.
Stopping
I ran two types of stopping tests: stopping from friction and stopping with controls.
To stop with friction, I simply ran the robot to near max speed then took my hands off the controls and let it run till stoppage. For stopping with controls, I would run the robot to near max speed, then quickly reverse the stick directions. Here is what I found:
To stop with friction in “slowly” mode, the car took about 2.5 feet on a slick wood surface.
To stop with friction in “speedy” mode, the car took about 5’ on the same surface. In both cases, the car tended to drift to the right.
Stopping with the controls was very reliable in “slowly” mode. The car could nearly stop on a dime.
Stopping with controls in “speedy” mode is very difficult. At max speed, simply reversing the sticks will always cause the car to flip. This goes for forward or reverse breaking.
The Simulator
In this section of the lab, I setup the robot simulator in my virtual machine and explored its capabilities. It took me a while to familiarize myself with the robot controls, especially the keyboard teleop controls). After some time, I was able to manipulate the robot comfortably.
I found that if the robot is grabbed with the mouse while following a keyboard input, the robot will continue to follow the keyboard input as it is dragged away by the mouse and will resume that input once placed.
Also, if the robot is crashed into a wall, a warning sign appears. I found that the best way to resolve this was to use the mouse to drag the robot off the wall, at which point the standard robot model would reappear.
Here I am driving the robot around!